
Cerner
Configure Cerner authorization, patient launch, and FHIR access for Medblocks Platform.
Cerner (Oracle Health) is an enterprise EHR platform used across hospitals and health networks worldwide. This is a step-by-step guide to registering a patient-facing SMART on FHIR app on Cerner’s open platform and taking it all the way to production.
Unlike Epic’s centralized distribution, Cerner requires per-organization activation - each hospital must independently enable your app within their tenant.
For Medblocks Platform integrations, use a confidential SMART app with PKCE and JWT client authentication. PKCE protects the authorization-code flow, and the backend proves the app’s identity at token exchange by signing a client_assertion JWT. Cerner verifies that JWT against the public key exposed through your registered JWKS URI.
Setup Guide
Prerequisites
If you’re serious about serving US patients and customers, having a US company will help with onboarding across the board. Stripe Atlas and StartFleet can get you a registered US entity with a real address in minutes.
For a US phone number, Tello gives you a virtual SIM with a real number. Grab a domain on Namecheap and set up a business email with Google Workspace - if you are using the Medblocks Platform, you can use app.medblocks.com as your domain and skip the domain setup entirely.
Since you’ll be serving US customers, you’ll need US infrastructure anyway. Set up a VM in a US cloud region, install Tailscale, and use it as your exit node. This gives you a clean, stable US IP for development and testing - much more reliable than a VPN, which often gets blacklisted.
- A registered business entity
- A publicly accessible domain with HTTPS for your redirect URI - or use
app.medblocks.comif you’re on the Medblocks Platform - A server-side backend that can handle the OAuth callback and store tokens securely
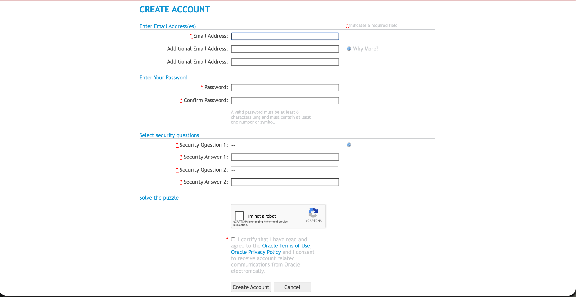
Create a Developer Account
-
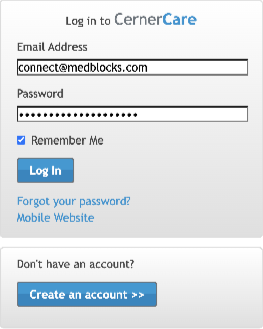
Go to Cerner Care and create a developer account.
-
Fill in your email and complete the secret questions, then submit the registration form.
- Once approved, sign in and navigate to the Cerner Code Console.
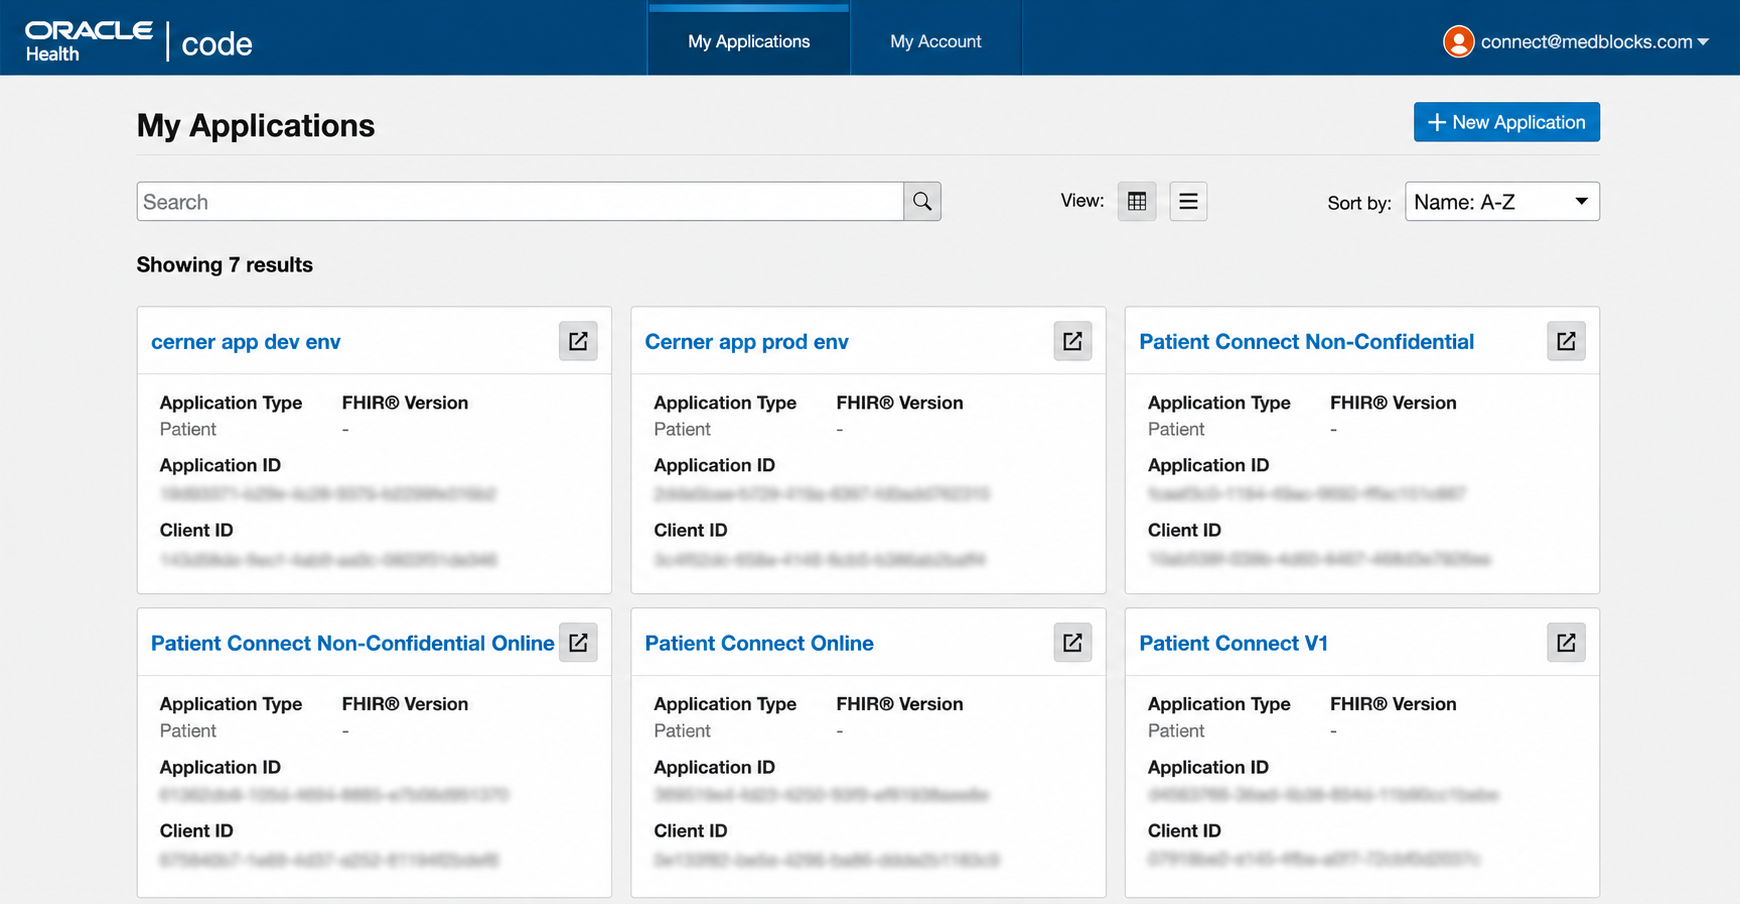
Create your Application
-
From the top navigation ribbon, click “My Applications”.
-
Click ”+ New Application”.
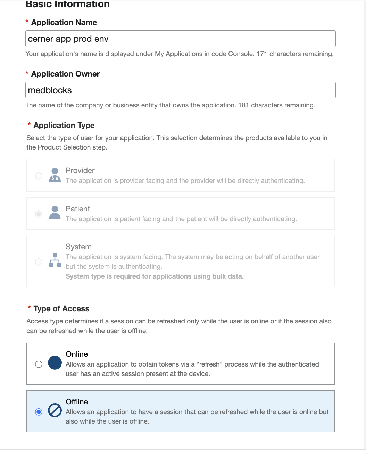
- Fill in the application details:
| Field | Value |
|---|---|
| App Name | Your app name |
| App Owner | Your organization name |
| App Type | Patient |
| Type of Access | Offline |
| SMART Version | SMART v1 |
| Intended Users | Individual / Caregiver |
| Intended Purposes | Individuals’ Access to their EHI |
| Redirect URI | https://app.medblocks.com/api/auth/smart/callback for Medblocks Platform |
| Type of Privacy | Confidential |
Public vs Confidential
Select Confidential for Medblocks Platform. The platform has a backend that can hold the signing key safely, preserve the PKCE code_verifier, and send a signed client_assertion JWT during token exchange.
Public apps are only appropriate for browser-only or native clients that cannot hold a credential. That is not the Medblocks Platform flow.
Configure Endpoint URIs
Add a redirect URI for each environment you need:
http://localhost:3000/api/auth/smart/callback             # local development
https://app.medblocks.com/api/auth/smart/callback         # Medblocks Platform
Using the Medblocks Platform? Your callback URL is already handled. Use https://app.medblocks.com/api/auth/smart/callback as your production redirect URI - no custom domain or backend setup needed.
Click Add Another URI if you need more environments (e.g. staging).
⚠️ Critical: The URI must match exactly - including protocol, domain, port, and path. Any mismatch causes an immediate redirect_uri_mismatch error before the patient sees the login screen.
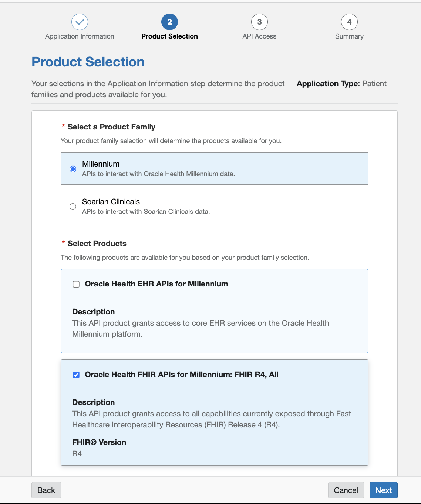
Configure Product Type
Set the following:
- Product Family:
Millennium - Products:
Cerner FHIR APIs for Millennium: FHIR R4, All
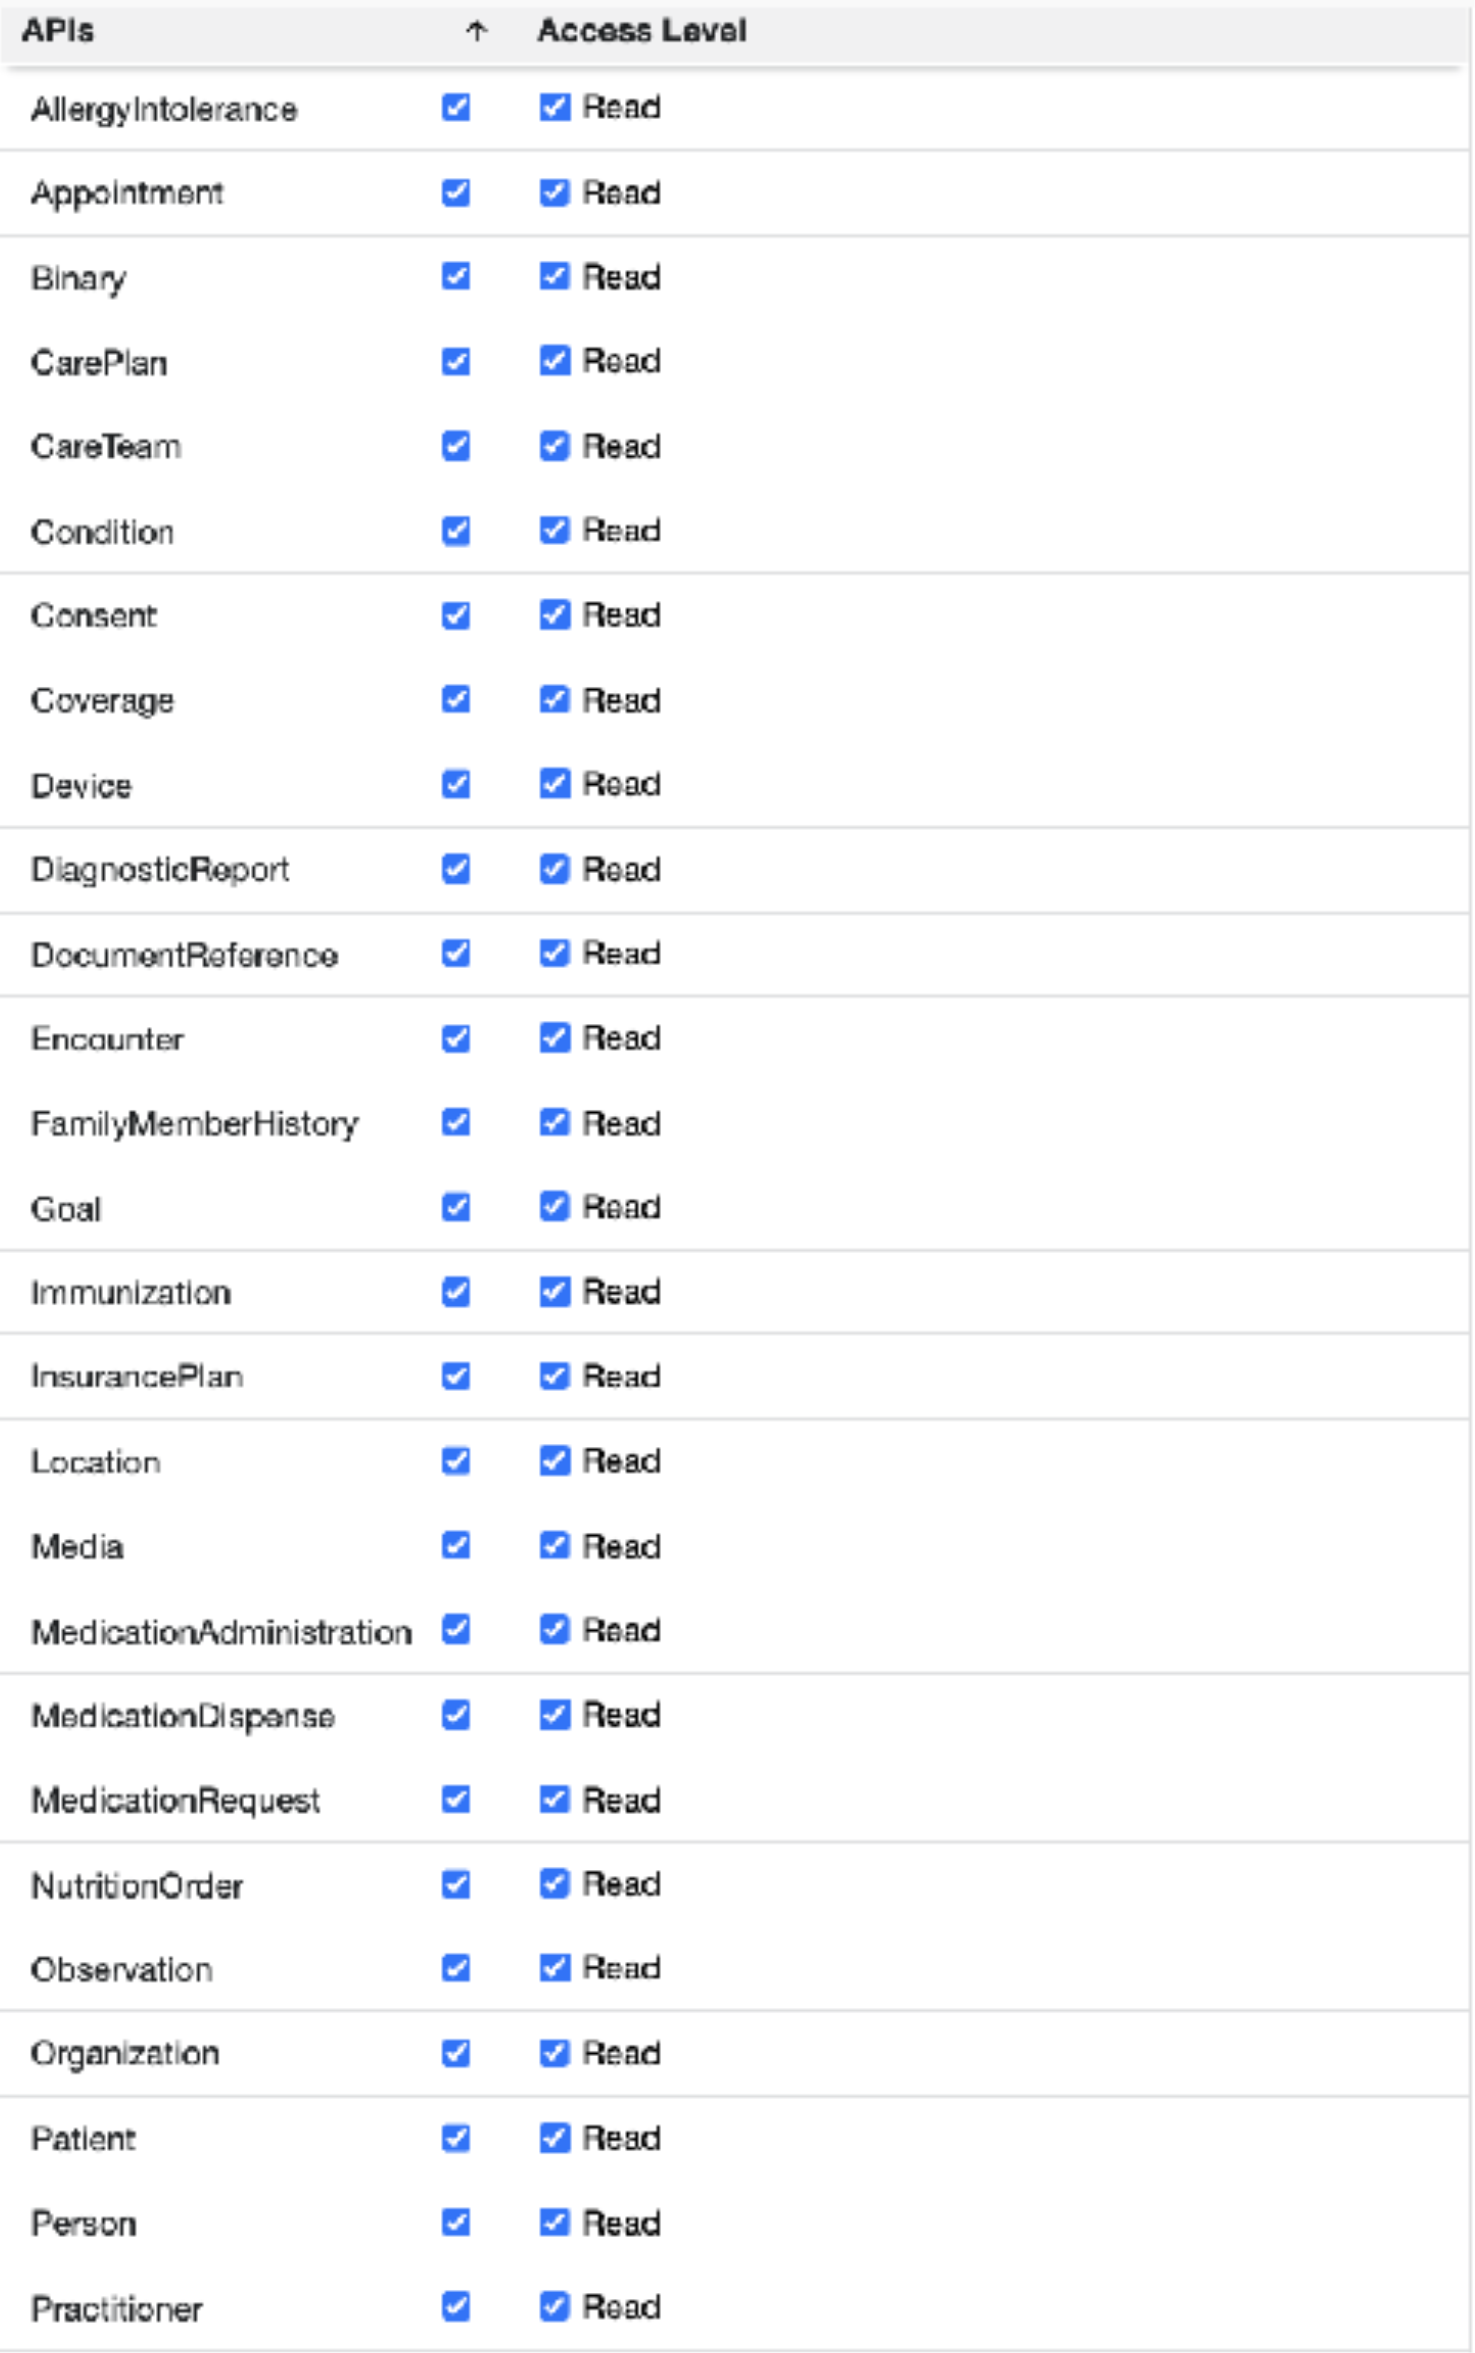
Select Scopes
Select the API resources relevant to your use case. At minimum:
- Patients
- Observations
For full USCDI v1 coverage, also select:
- AllergyIntolerance, CarePlan, CareTeam, Condition, Device, DiagnosticReport, DocumentReference, Encounter, Goal, Immunization, MedicationRequest, Procedure, ServiceRequest, Coverage, RelatedPerson
Important Notes on Scopes
| Scope | Why it matters |
|---|---|
offline_access | Required for refresh tokens. Without it the patient must re-authenticate every ~1 hour when the access token expires. |
fhirUser | Required to identify the patient from the ID token’s fhirUser claim. Without it your backend cannot link the token to a patient record. |
| Scope mismatch | Only request scopes registered on the app. Any unregistered scope causes an invalid_scope error during authorization. |
Set up Authentication
Cerner’s patient-facing flow has two pieces:
- PKCE binds the authorization request to the token exchange. The backend creates a
code_verifier, sends the derivedcode_challengeto Cerner, then sends the originalcode_verifierwhen exchanging the code. - JWT client authentication proves the confidential app’s identity. The backend signs a
client_assertionJWT with its private key, and Cerner verifies it using the public key from the JWKS URI you register in the system account.
The token exchange should include:
client_idcoderedirect_urigrant_type=authorization_codecode_verifierclient_assertion_type=urn:ietf:params:oauth:client-assertion-type:jwt-bearerclient_assertion
Here is a minimal example of generating the PKCE pair server-side:
import { randomBytes, createHash } from "crypto";

const codeVerifier = randomBytes(96).toString("base64url"); // 128-char URL-safe string
const codeChallenge = createHash("sha256")
  .update(codeVerifier)
  .digest("base64url");

// Store codeVerifier server-side (e.g. encrypted session cookie)
// Send codeChallenge + code_challenge_method=S256 in the authorization request
// Send codeVerifier in the token exchange request
If you are integrating through Medblocks Platform, the platform handles the private key, JWT signing, JWKS endpoint, PKCE verifier storage, and token exchange. You only need to register the app as confidential and add the Medblocks JWKS URI in Cerner.
Save your Client ID
After saving the application, Cerner assigns a Client ID in UUID format:
xxxxxxxx-xxxx-xxxx-xxxx-xxxxxxxxxxxx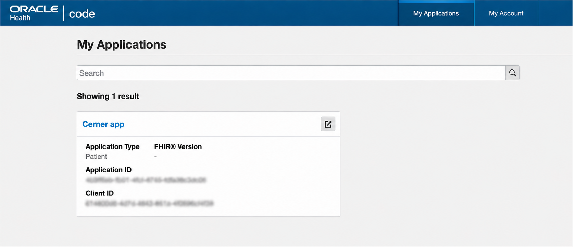
Copy this value. You will pass it as client_id in all authorization and token requests. If you are using the Medblocks Platform, enter it under Settings → EHR Clients → Cerner.
Note: The Client ID is not a secret. It appears in every authorization URL and is visible to anyone. App identity is proven by the signed client_assertion JWT, and the authorization code is protected by PKCE.
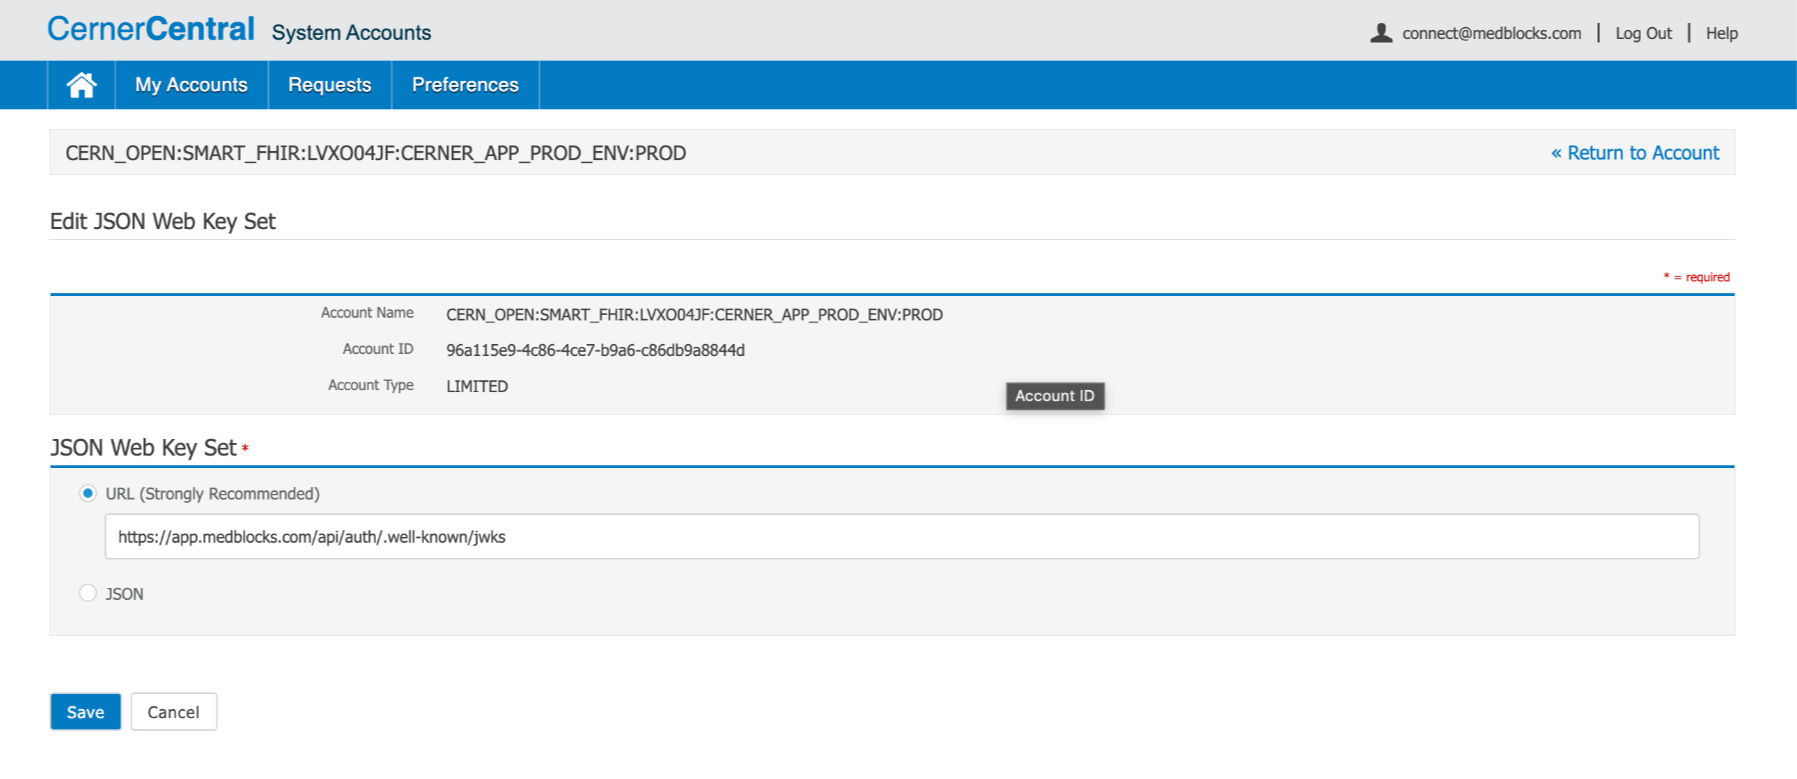
Register your JWKS URI
After creating your Confidential app, Cerner provisions a System Account for it. Register your JWKS URI there so Cerner can verify the JWT assertions your backend sends to the token endpoint.
- Navigate to:
https://cernercentral.com/system-accounts/{your-client-id}Replace {your-client-id} with the client ID from step 7.
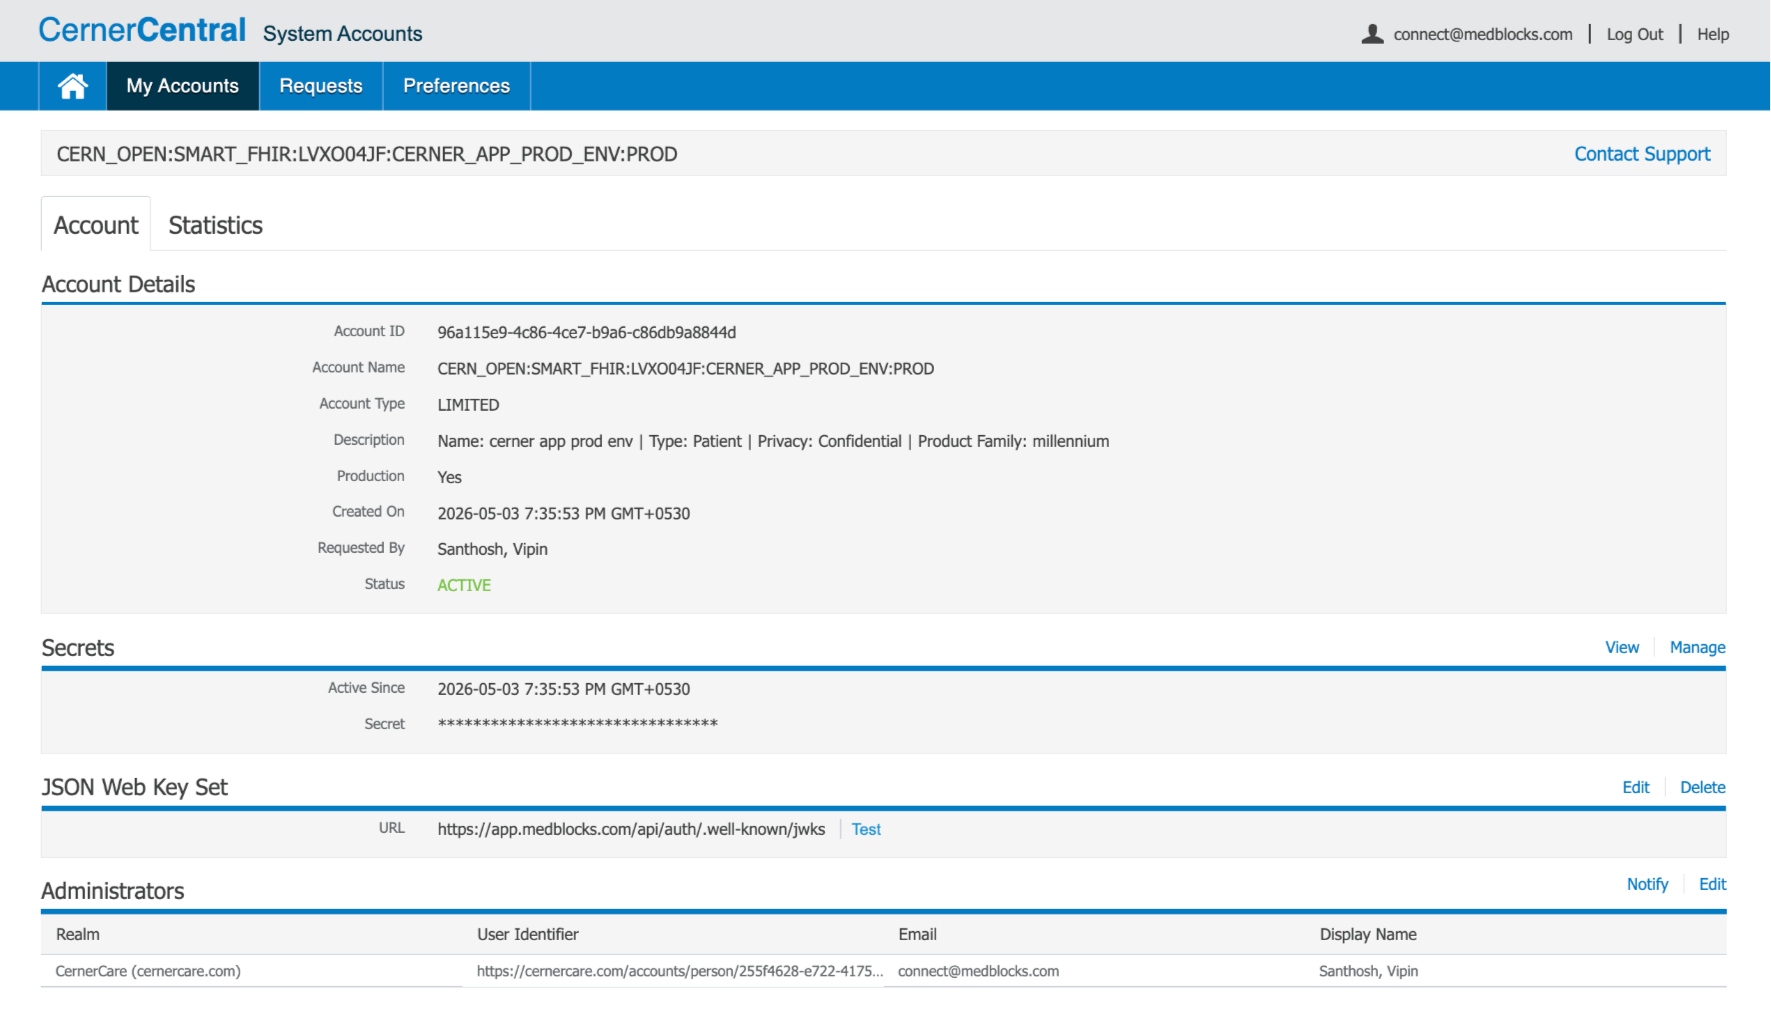
-
Under the JSON Web Key Set section, click Edit.
-
Enter the Medblocks Platform JWKS URI:
https://app.medblocks.com/api/auth/.well-known/jwks-
Save. Cerner will fetch this public key set when verifying JWT assertions.
-
Enter the Client ID in the Medblocks admin panel under Settings → EHR Clients → Cerner.
Verify the endpoint is reachable before saving:
curl https://app.medblocks.com/api/auth/.well-known/jwksIt should return a JSON object with a keys array containing your RSA public key.
If you are self-hosting instead of using Medblocks Platform, generate and store your own private key, expose its public key as JWKS over HTTPS, and sign the client_assertion JWT with a kid that matches one of the keys in that JWKS.
Test with Cerner Sandbox
Cerner provides a sandbox environment per tenant. Each hospital has its own tenant_id embedded in its FHIR base URL.
Sandbox Endpoint Structure
| Endpoint | URL |
|---|---|
| FHIR Base | https://fhir-myrecord.cerner.com/r4/{tenant_id} |
| Auth Endpoint | https://authorization.cerner.com/tenants/{tenant_id}/protocols/oauth2/profiles/smart-v1/personas/patient/authorize |
| Token Endpoint | https://authorization.cerner.com/tenants/{tenant_id}/hosts/fhir-myrecord.cerner.com/protocols/oauth2/profiles/smart-v1/token |
You can discover these endpoints programmatically from the SMART configuration endpoint:
GET https://fhir-myrecord.cerner.com/r4/{tenant_id}/.well-known/smart-configurationActivate Organizations
Unlike Epic’s USCDI v3 auto-distribution, Cerner does not have a global “mark ready for production” button that pushes your app to all organizations automatically.
Production access is per-organization. For each Cerner customer hospital you want to support:
- Contact the organization’s Cerner integration or IT team
- Provide them with:
- Your Client ID
- Your production redirect URI -
https://app.medblocks.com/api/auth/smart/callbackfor Medblocks Platform - The list of scopes your app requests
- They activate your app within their Cerner tenant configuration
- Use their FHIR base URL to build your authorization request:
https://fhir-myrecord.cerner.com/r4/{their_tenant_id}Once activated, patients at that organization can authenticate and pull their health records through your app.
Add the Source in Medblocks Platform
Once a Cerner organization has activated your app:
- Navigate to Settings → EHR Clients → Cerner in the Medblocks admin panel
- Enter your Client ID if you haven’t already
- The organization’s FHIR base URL (
https://fhir-myrecord.cerner.com/r4/{tenant_id}) needs to be added to the Medblocks FHIR sources database - contact Medblocks support to get this added for each new organization
Once the FHIR source is added, patients at that organization will see Cerner as a connect option in your app.
FHIR API Usage
After token exchange, fetch patient resources using:
GET https://fhir-myrecord.cerner.com/r4/{tenant_id}/{Resource}
Authorization: Bearer {access_token}
Accept: application/fhir+json
Resources Available via Cerner FHIR R4
| Resource | Description |
|---|---|
Patient | Demographics |
AllergyIntolerance | Allergies and intolerances |
CarePlan | Care plans |
CareTeam | Care team members |
Condition | Problems and diagnoses |
Device | Implanted / used devices |
DiagnosticReport | Lab and imaging reports |
DocumentReference | Clinical documents |
Encounter | Visits and encounters |
Goal | Patient goals |
Immunization | Vaccination history |
MedicationRequest | Prescriptions |
Observation | Labs and vital signs |
Procedure | Performed procedures |
ServiceRequest | Ordered services |
Coverage | Insurance coverage |
RelatedPerson | Family / related contacts |
Token Lifecycle
| Token | Lifetime | Behaviour |
|---|---|---|
access_token | ~1 hour | Used as Bearer token on all FHIR API calls |
refresh_token | Rolling | Each use issues a brand new refresh token |
Refresh tokens should be stored securely server-side. If a refresh token expires (patient inactive for an extended period), the patient must re-authenticate from scratch.
Common Errors and Fixes
| Error | Cause | Fix |
|---|---|---|
redirect_uri_mismatch | URI does not exactly match the registered value | Check protocol (http/https), trailing slashes, full path |
invalid_grant | Authorization code expired or already used | Codes are single-use with ~1 min expiry - never reuse or cache |
invalid_scope | A scope in the request is not registered on the app | Only request scopes approved at app registration |
invalid_client | Wrong Client ID | Verify the UUID from code-console.cerner.com |
401 Unauthorized | Expired access token sent to FHIR API | Refresh the access token before it expires |
CORS error | FHIR call made directly from the browser | All FHIR calls must go through your backend - never from the client |
| No patient context | fhirUser scope is missing | Add fhirUser to the app’s scope list and re-register |